PSU Raspberry Pi Case - 25/11/17
The idea behind this project was to mount the Raspberry Pi microcomputer which runs my home security system along with all of its wires into a neat box which had sufficient ventilation.
In this case, an old PC power supply ticked all the boxes: it had a hole at the back for wires, ventilation, and could hold the Raspberry Pi. All of its plugs (HDMI etc.), and the breadboard which links it to the security system wiring. As well as these capabilities, it had a hole in the front (previously used for a mains connector) through which I could poke the security camera (a Raspberry Pi camera module).
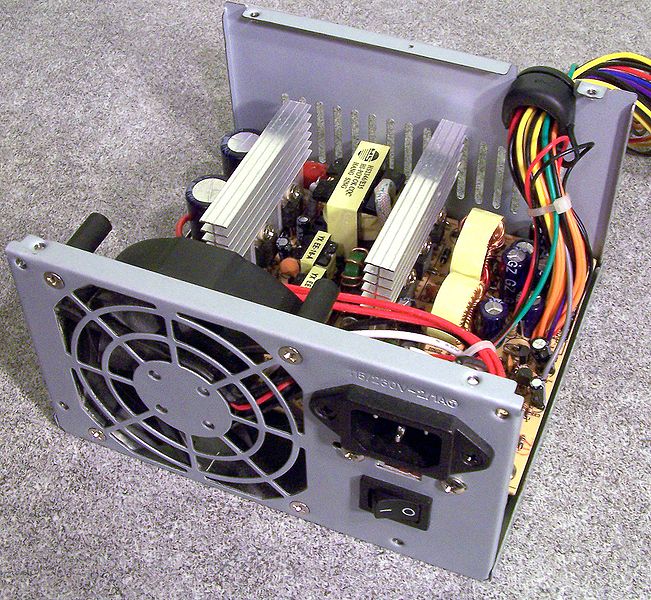
I began by removing the power supply cover - this uncovers three sides of the power supply and is generally removed by means of four screws. Next I unscrewed the circuit board from inside the power supply; this also removes the big bundle of cables which generally hangs out of the back of an ATX power supply. Before removing the circuit board I disconnected the cooling fan from the circuit board (it connects via a small plug) and left the fan mounted in the front grille since I would use it later. The last things left to deal with were the front power switch and the mains input connector. These can often be removed by prising them out with a flat-head screwdriver; note that the switch may be left in its place to control the fan (I did not do this since I wanted the fan on all the time). With the inside of the power supply removed I measured and cut a piece of stiff card to fit inside the bottom of the metal case because I did not want the metal case to short-circuit any of the bare-metal components on the underside of the Raspberry Pi's circuit board.
Below you see an open PC power supply. This is how mine looked upon having had its cover removed. You can also see the front fan and the rear hole through which I routed wires:

With the case prepared I lifted the Raspberry Pi out of its old mounting (an open top cardboard box) and placed it inside the power supply case along with its connection breadboard. Next, I routed all of the cables (for the security system etc.) out of the hole in the back of the power supply before poking the camera module through the hole in which the mains connector had been situated: this allowed the security camera part of the system to see out of the metal box. With everything installed in the case, I wired the fan to external 12v cabling and made sure that no wires were in the way of its blades. Finally, I put the cover over the power supply without screwing it in so as to give protection but allow easy access in the future.
After having used this system for a few months, I have not had any issues either with cooling or with short-circuits and indeed the whole setup now looks a great deal neater than it used to.